 |
| Figure 1 |
2. Choose Simulate > Particle > Emitter from the main menu; a Emitter is added to the Object Manager.
3. Make sure the Tracer is selected in the Object Manager. In the Attribute Manager, choose the Object button; the Object Properties area is displayed. In the Object Properties area, drag Emitter to the Trace Link, as shown in Figure 2.
 |
| Figure 2 |
4. Make sure that Emitter is selected in the Object Manager. Press and hold the left mouse button on Emitter and drag the cursor to Tracer in the Object Manager; the Emitter is connected to Tracer in the Object Manager.
5. Select the Tracer in the Object Manager. In the Attribute Manager, choose the Object button; the Object Properties area is displayed. In the Object Properties area, select From End from the Limit drop-down list and enter 15 in the Amount edit box.
6. Select the Emitter in the Object Manager. In the Attribute Manager, choose the Particle button; the Particle area is displayed. In the Object Properties area, set the parameters as follows:
Birthrate Editor: 2000 Birthrate Renderer: 4000
Start Emission: 0 End Emission: 25
Lifetime: 100 Speed: 400
7. In the Attribute Manager, choose the Emitter button; the Emitter area is displayed. In the Emitter area, set the parameters as follows:
X-Size: 0 Y-Size: 0
Angle Horizontal: 360 Angle Vertical: 180
8. Now, choose the Play Forwards button; the emitter is displayed in the viewport, as shown in Figure 3.
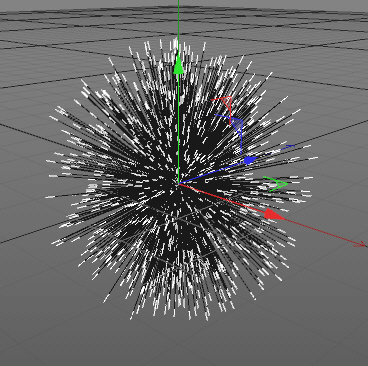 |
| Figure 3 |
Start Emission: 25 End Emission: 55
Lifetime: 125
10. Select the Tracer.1 and choose the Coord. button in the Attribute Manager. Next, enter -1467 in the P . X spinner; the Tracer.1 is positioned in the viewport, as shown in Figure 4.
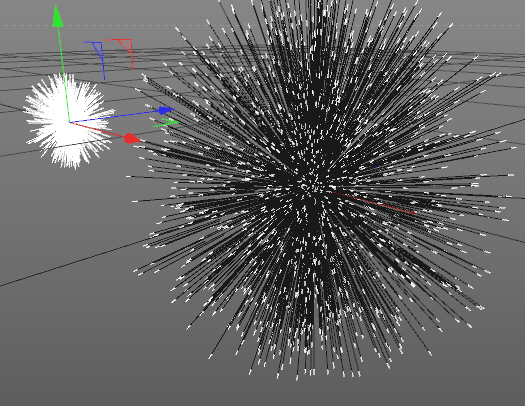 |
| Figure 4 |
11. Again, create a copy of Tracer and Emitter; the Tracer.2 is added to the Object Manager. Select Emitter connected to Tracer.2.In the Attribute Manager, choose the Particle button; the Particle area is displayed. In the Object Properties area, set the parameters as follows:
Start Emission: 45 End Emission: 100
Lifetime: 125
12. Select the Tracer.1 and choose the Coord. button in the Attribute Manager. Next, enter 674 in the P . X spinner; the Tracer.1 is positioned in the viewport.
13. In the Object Manager, select the Tracer and right-click on it; a flyout is displayed. In the flyout, choose Sketch Tags > Sketch Style; a Sketch Style Tag is added to the Object Manager, as shown in Figure 5.
 |
| Figure 5 |
 |
| Figure 6 |
15. In the Default Visible area, expand the Modifiers area and select the Along Stroke check box, as shown in Figure 7.
 |
| Figure 7 |
 |
| Figure 8 |
17. In the Object Manager, select the Tracer.1 and right-click on it; a flyout is displayed. In the flyout, choose Sketch Tags > Sketch Style; a Sketch Style Tag is added to the Object Manager.
21. In the Object Manager, select the Tracer.2 and right-click on it; a flyout is displayed. In the flyout, choose Sketch Tags > Sketch Style; a Sketch Style Tag is added to the Object Manager.
28. Render the scene.
18. Select the Sketch Style Tag in the Object Manager. In the Attribute Manager, choose the Lines button; the Lines area is displayed. In the Attribute Manager, expand the Default Visible attribute; the Default Visible area is displayed.
19. In the Default Visible area, expand the Modifiers area and select the Along Stroke check box.
20. In the Along Stroke area, set the color of Gradient, as shown in Figure 9.
 |
| Figure 9 |
22. Select the Sketch Style Tag in the Object Manager. In the Attribute Manager, choose the Lines button; the Lines area is displayed. In the Attribute Manager, expand the Default Visible attribute; the Default Visible area is displayed.
23. In the Default Visible area, expand the Modifiers area and select the Along Stroke check box.
24. In the Along Stroke area, set the color of Gradient, as shown in Figure 10.
 |
| Figure 10 |
25. Choose the Edit Render Settings tool from the Command Palette; the Render Settings window is displayed. In this window, choose the Effect button; a flyout is displayed. In this flyout, choose Glow and Sketch and Toon options; the Glow and Sketch and Toon effects are added to the Render Settings window.
26. In the Render Settings window, select the Sketch and Toon option; the Sketch and Toon area is displayed. In this area, choose the Shading button; the Shading area is displayed. In this area, select black color for Color attribute.
27. In the Render Settings window, select the Glow option; the Glow area is displayed. In this area, enter 10 in the Size spinner.
28. Render the scene.

No comments:
Post a Comment