The MoSpline is a Spline generator with which you can grow flower-like spline shapes and animate growing splines. In this tutorial, you will create motion graphics, shown in Figure 1 using Mospline.
1. Choose Create > Spline from the main menu; a cascading menu is displayed. Now, choose Circle from it; a Circle is added to the Object Manager.
6. Choose Create > NURBS from the main menu; a cascading menu is displayed. Now, choose Sweep NURBS from it; a Sweep NURBS is added to the Object Manager.
16. Double-click in the Material Manager; a new shader with the name Mat is created in the Material Manager. Select the shader; the Material Editor is displayed. In the Color area, set the parameters as follows:
 |
| Figure 1 |
2. Make sure the Circle is selected in the Object Manager. In the Attribute Manager, choose the Object button; the Object Properties area is displayed. In the Object Properties area, enter 5 in the Radius spinner.
3. Choose MoGraph > MoSpline from the main menu; a MoSpline is added to the Object Manager.
4. Make sure the MoSpline is selected in the Object Manager. In the Attribute Manager,choose the Object button; the Object Properties area is displayed. In the Object Properties area, enter 0.7 in the Offset spinner and clear the Extend End check box.
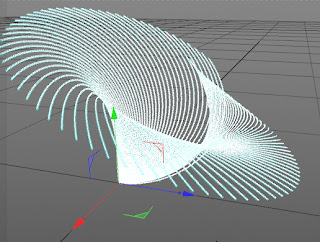
5. Make sure the MoSpline is selected in the Object Manager. In the Attribute Manager,choose the Simple button; the Simple area is displayed. In the Simple area, set the parameters as follows:
Length: 1086 Steps: 24 Segments: 100
Angle H: 198 Angle P: 183 Angle P: 182
Curve: 129 Bend: 48 Twist: 50
Width: 3.19
After entering these values MoSpline is displayed, as shown in Figure 2.
 |
| Figure 2 |
7. Make sure that MoSpline is selected in the Object Manager. Press and hold the left mouse button on MoSpline and drag the cursor to Sweep NURBS in the Object Manager; the MoSpline is connected to Sweep NURBS in the Object Manager. Similarly, drag Circle to Sweep NURBS in the Object Manager; the Circle is connected to Sweep NURBS in the Object Manager.
8. Select MoSpline in the Object Manager. Choose MoGraph > Effector > Random; Random is added to the Object Manager.
9. Select Random in the Object Manager. Choose the Parameter button. Expand the Transform area, clear the Position check box and select the Scale check box. Next, enter 0.38 in the S . Y spinner. Next, enter 0.45 in the S . Z spinner.
10. In the Transform area, select the Rotate check box and enter 36 in the R . H spinner and 6 in the R . P spinner.
11. Choose Create > Light > Light from from the main menu; a light is added to the Object Manager.
12. Make sure that Light is selected in the Object Manager. In the Object Manager, choose the General button. In the General area, select Shadow Maps (Soft) from the Shadow drop-down list and Volumetric from the Visible Light drop-down list.
13. Choose the Visibility button. In the Visibility area, enter 25 in the Outer Distance spinner. Choose the Lens button in the Attribute Manager and select Candle from the Glow drop-down list.
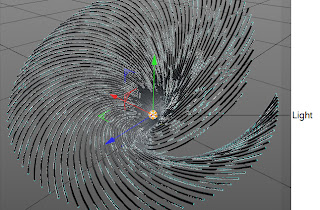
14. Now, invoke the Move tool and place the Light in center of the MoSpline in the Perspective viewport, as shown in
Figure 3.
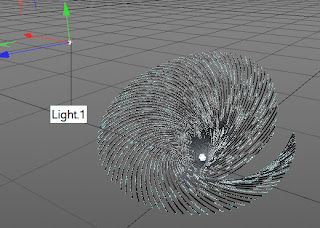
15. Choose Create > Light > Light from from the main menu; a Light.1 is added to the Object Manager. place the Light on the top of the MoSpline, as shown in Figure 4.
12. Make sure that Light is selected in the Object Manager. In the Object Manager, choose the General button. In the General area, select Shadow Maps (Soft) from the Shadow drop-down list and Volumetric from the Visible Light drop-down list.
13. Choose the Visibility button. In the Visibility area, enter 25 in the Outer Distance spinner. Choose the Lens button in the Attribute Manager and select Candle from the Glow drop-down list.
14. Now, invoke the Move tool and place the Light in center of the MoSpline in the Perspective viewport, as shown in
Figure 3.
 |
| Figure 3 |
 |
| Figure 4 |
R: 143 G: 34 B: 197
17. In the Material Editor, select the Reflection check box; the Reflection area is displayed. In the Reflection area, enter 46 in the Brightness spinner.
18. Make sure the Mat is selected in the Material Manager. Drag and drop the Mat shader on the MoSpline in the Object Manager; the Mat is applied to the MoSpline.
19. Choose the Render to Picture Viewer button from the Command Palette; the rendering takes place in the Picture Viewer window.
ok
ReplyDelete